這篇要介紹一個好用的Arduino計時器(Timer)程式庫,由Dr. Monk所開發,由Jack Christensen稍加修改後放在github上。
下載並解壓縮後,把目錄改名成Timer,搬移到Arduino軟體開發環境的sketchbook目錄的libraries子目錄下,你可以從File-Preferences-Sketchbook location:查到sketchbook目錄在哪,若裡面沒有libraries這個子目錄,請自行建立,然後把計時器程式庫整個Timer目錄搬進去。
需要重新開啟Arduino軟體開發環境,它才知道你新安裝的程式庫。
先舉個例子,假設要閃爍一個LED,點亮1秒,熄滅1秒,不斷循環,應該很簡單(這通常會是學習Arduino的第一支程式),程式碼如下:
假設Arduino腳位2接到LED的長腳(中間串接220 ohm電阻),短腳接地。
void setup() {
pinMode(2, OUTPUT);
}
void loop() {
digitalWrite(2, HIGH);
delay(1000);
digitalWrite(2, LOW);
delay(1000);
}
好,那接下來,如果腳位3、4、5也都接了LED,我們想要讓每個LED以不同頻率閃爍,那該怎麼寫呢。
unsigned long previous_time;
void setup() {
pinMode(2, OUTPUT);
pinMode(3, OUTPUT);
pinMode(4, OUTPUT);
pinMode(5, OUTPUT);
digitalWrite(2, HIGH);
digitalWrite(3, HIGH);
digitalWrite(4, HIGH);
digitalWrite(5, HIGH);
previous_time = millis();
}
void update2(unsigned long time_passed){
static unsigned long time = 0;
time += time_passed;
if((time / 200) % 2 == 0){ // 腳位2的LED明滅頻率為0.2秒
digitalWrite(2, HIGH);
}
else{
digitalWrite(2, LOW);
}
}
void update3(unsigned long time_passed){
static unsigned long time = 0;
time += time_passed;
if((time / 300) % 2 == 0){ // 腳位3的LED明滅頻率為0.3秒
digitalWrite(3, HIGH);
}
else{
digitalWrite(3, LOW);
}
}
void update4(unsigned long time_passed){
static unsigned long time = 0;
time += time_passed;
if((time / 400) % 2 == 0){ // 腳位4的LED明滅頻率為0.4秒
digitalWrite(4, HIGH);
}
else{
digitalWrite(4, LOW);
}
}
void update5(unsigned long time_passed){
static unsigned long time = 0;
time += time_passed;
if((time / 500) % 2 == 0){ // 腳位5的LED明滅頻率為0.5秒
digitalWrite(5, HIGH);
}
else{
digitalWrite(5, LOW);
}
}
void loop() {
unsigned long current_time = millis();
unsigned long time_passed;
if(current_time > previous_time ){
time_passed = current_time - previous_time;
}
else{
time_passed = ULONG_MAX - previous_time + current_time;
}
if(time_passed >= 100){
update2(time_passed);
update3(time_passed);
update4(time_passed);
update5(time_passed);
previous_time = current_time;
}
}
每次在loop裡,檢查距離上次更新是否經過了100ms(0.1秒),若是,呼叫update2、update3、update4、update5四個函式,分別負責更新腳位2、3、4、5的狀態。
你可以看得出來,有越多東西要處理,程式就會變得越複雜。若是有Timer計時器程式庫的話,就會變得簡單許多。
改用計時器後的程式碼如下:
// 首先匯入程式庫標頭檔Timer.h
#include <Timer.h>
// 用四個計時器控制四個LED
Timer t2;
Timer t3;
Timer t4;
Timer t5;
void setup() {
pinMode(2, OUTPUT); // 腳位設定為輸出模式
pinMode(3, OUTPUT);
pinMode(4, OUTPUT);
pinMode(5, OUTPUT);
t2.oscillate(2, 200, HIGH); // 以oscillate設定每幾毫秒切換一次狀態
t3.oscillate(3, 300, HIGH); // 第一個參數:哪個腳位
t4.oscillate(4, 400, HIGH); // 第二個參數:幾毫秒
t5.oscillate(5, 500, HIGH); // 第三個參數:初始狀態
}
void loop() {
// 在loop裡,呼叫每個計時器的update,它才能運作更新狀態
t2.update();
t3.update();
t4.update();
t5.update();
}
如何,是不是簡單許多、合理許多了呢。
還有個every方法,每經過一段時間,就呼叫某回呼函式。範例:
#include <Timer.h>
Timer tcb;
void writeToSerial(){
static unsigned long count = 0;
Serial.println(count); // 從0開始輸出,每次加1
count++;
}
void setup() {
Serial.begin(115200);
tcb.every(1000, writeToSerial); // 每經過1000毫秒,就會呼叫writeToSerial
}
void loop() {
tcb.update();
}
其他功能還有after(經過一段時間後,呼叫某函式,只呼叫一次)、pulse(經過一段時間後,切換某腳位的狀態,只一次)、stop(取消某個計時器事件)、等等,可看看原文章的最下面,有API解說。
PS 另外有個計時器程式庫叫Metro,不過我覺得比較不好用。
2012/03/25
Arduino一個好用的計時器程式庫
2012/03/23
Objective-C與iOS的學習資源
問:學習Objective-C的書籍?
答:
Learn Objective–C on the Mac by Mark Dalrymple and Scott Knaster, Apress.
這本的內容是Objective-C跟一些基本的Cocoa Foundation Framework,是學習Objective-C的入門書,這本書假設你已經有C語言的基礎,所以不適合沒有任何程式語言基礎的人看。本書在我認為這是本很棒的書,平易近人,值得推薦。
另外,本書出版日期是2008.12,是在Mac OS X Snow Leopard v10.6(2009.08)之前,也就是說,本書沒有講Objective-C新加入的功能與特色,譬如block(在OS X v10.6與iOS 4.0才有)。
這本書有第二版了,書名為Learn Objective-C on the Mac: For OS X and iOS,出版日期2012.06,太棒了,包含了所有新特色新功能,block、ARC、等等。
Programming in Objective-C 2.0 2nd Edition by Stephen G. Kochan, Addison-Wesley.
這本的作者認為太熟C反而妨礙以Objective-C的方式去思考,所以不假設你會C。在很久以前,講Objective-C的書籍似乎只有這一本,所以那時很多人也只能看這本。我認為這本寫的中規中矩,不錯,而且不斷地更新。這本書有官方論壇,作者會親自回答問題喔。
第二版有中文翻譯本。
第三版已經在2011.06出版囉,有講block。
第四版已經在2011.12出版囉,有講block與ARC。有中文翻譯本:精通Objective-C 程式設計 第四版。
第五版已經在2012.12出版囉,中文翻譯本:精通 Objective-C 程式設計 第五版。
Learning Objective-C 2.0: A Hands-On Guide to Objective-C for Mac and iOS Developers by Robert Clair,也是學習Objective-C不錯的入門書,裡面有介紹剛剛進入mac os x與iOS的開發環境,需要熟悉的一些基本東西與觀念,例如什麼是bundle、framework、AppKit、Core Foundation等等,前面兩本的重心都是放在Objective-C上,這本則加入了開發iOS的基礎知識,算是不錯的選擇。
Objective-C for Absolute Beginners: iPhone and Mac Programming Made Easy by Gary Bennett, Brad Lees, and Mitchell Fisher, Apress.
看到這本書的書名你就能猜到,專門為想寫iPhone與Mac軟體的初學者入門書,從最基本教起,譬如說書一開始還講解什麼是演算法、什麼是軟體開發流程、什麼是bit、十進位與二進位的轉換等等,但頁數卻不到三百,也就是說,講的都非常簡單非常基本。呃,我不會推薦你看這本。
Objective-C Phrasebook by David Chisnall, Addison-Wesley.
使用Objective-C寫程式,多年以後,自然而然會有慣用法、經驗累積、最佳的程式片段,這本書就是作者的心得精華,裡面每一章都很短,範例程式也很短,內容涵蓋Objecitve-C執行週期程式庫、記憶體管理、property lists、key-value coding、各種基本的類別(數字、字串、陣列、日期時間等等)。不錯的書。
Pro Objective-C Design Patterns for iOS by Carlo Chung, Apress.
這本書就是講GoF Design Patterns裡面的那23個設計範式,只不過改以Objective-C來表達,並以iOS的Cocoa Touch為基礎,書裡的程式碼都是要在Xcode與iOS SDK上跑的。
Cocoa Design Patterns by Erik M. Buck與Donald A. Yacktman,Addison Wesley 2009年9月出版。沒看過,看書名應該是Mac上的Cocoa的設計模式。
Cocoa設計模式,譯者賀以翔、林銘鴻、吳國慶,上奇2011年12月出版。上一本的中文譯本。
Pro Objective-C for Mac and iPhone by Michael Ash and James Dovey, Apress. 尚未出版。看起來應該是進階的書。
Objective-C For Dummies by Neal Goldstein, For Dummies. 沒看過。
Objective-C Programming: The Big Nerd Ranch Guide by Aaron Hillegas and Mark Fenoglio, Addison-Wesley。
這本書應該是寫給沒碰過C、沒碰過Objective-C、沒碰過Xcode、沒碰過iOS的人看的,不到300頁的篇幅,卻要介紹這麼多東西,很厲害,言簡意賅,不廢話。作者的目的應該是打算用最少篇幅引人入門,安裝Xcode、學習基本的C語言、然後是Objective-C與Foundation framework,然後是建立iOS與Mac應用程式,頁數不多,所以講的都是最基本最重要的。
我個人不太喜歡這樣的書籍,因為我還是要再買一本好好介紹Objective-C的書、還是要再買一本講解開發iOS的書。不過這本的優點是,不到300的頁數,很快就能翻過一遍,就能對iOS開發需要的程式能力有基本的概念,不錯。
詳解 Objective C─iPhone / iPad / Mac OS X 標準程式設計與實作 by 荻原剛志,博碩出版。日文翻譯過來的,沒看過。
Objective-C 2.0 iPhone/iPad/Max OS X 程式設計講座,荻原剛志 著、鄭英龍、連軒甫 譯,博碩。上一本的更新版,加入Objective-C 2.0的新功能。
學會 Objective-C 的 24 堂課─撰寫 iPhone 應用程式的初體會,第二版,by 蔡明志,碁峰出版。
寫的中規中矩,可以考慮。本書從C語言介紹起,然後是Objective-C,然後是一些Foundation Framework,最後有一章的篇幅稍微介紹iPhone的開發。
本書第二版雖然在封面上印上"針對XCode 4.x全新改版",但我只發現iPhone那一章更新了。關於Objective-C的部份應該沒變。沒有介紹Objective-C的新功能:block、Automatic Reference Counting(ARC),沒有Interface Builder的新功能storyboard。
Objective-C 與 iOS 開發入門 by Michael Pan 潘聖文,藍海文化出版。
這本書約400頁,其中300頁左右介紹iOS開發,100頁左右介紹Objective-C,應該是為了介紹iOS的部份,所以才特別加上介紹Objective-C那部分,光就此書有涵蓋的內容來看,寫的還算不錯,但是篇幅不夠,以致於Objective-C講的太少;iOS的部份還OK,但300頁不太夠。我是覺得有點可惜了,被篇幅限制住了。
輕鬆學 Objective C-開發你的 iPhone/iPad 應用程式 by 楊正洪、鄭齊心、李建國,上奇出版。
簡體版翻譯過來的,裡面有少數幾個名詞依然是大陸用語,不過應該不影響閱讀。這本以Objective-C與Foundation Framework為主,只有一兩章才是iOS開發。我只有翻閱過,不能做評論,大家到書店翻翻看合不合胃口吧。
Objective-C 2.0 Essentials,可線上閱讀的著作,但不全,可購買完整版,內容範圍很廣。
這邊有一張Objective-C的小抄,Ray Wenderlich寫的。
然後看Apple文件(免費下載或線上閱讀),這些算是官方文件,內容精鍊,有疑惑時都要來這裡。
The Objective-C Programming Language,對語言本身有什麼疑義,找這裡就對了。
Memory management Programming Guide,Cocoa(Foundation+AppKit)的物件記憶體管理通則。
Objective-C Runtime Programming Guide,除了語言(compiler)外,還要有runtime環境,這文件告訴你Objective-C在執行時需要的支援,message forwarding的機制,dynamic method resolution的機制等等。
Objective-C Runtime Reference,上一份文件的補助,參考文件,詳列runtime library中實作的函式。
Object-Oriented Programming with Objective-C,顧名思義,Objective-C與物件導向。
這裡CocoaChina Wiki有把一些蘋果官方文件翻譯成中文。
問:Objective-C有1.0與2.0之分?
答:在2007.10,Apple推出Mac OS X 10.5,也推出Objective-C 2.0,目前只有Xcode中的compiler(Apple修改過的gcc)以及clang(llvm)能夠吃2.0,也只有Mac OS X 10.5, iPhone, iPad的runtime環境可以跑2.0。
2.0多了這些東西:garbage collection、properties、non-fragile instance variables、fast enumeration。
另外,後來Objective-C又加入新的功能特色block與ARC(automatic reference counting)。
PS 嚴格說來,block應該算做C語言的擴充功能。
問:有線上的教學文件嗎?
答:網路上可以找到很多,請自行判斷優劣。
問:優良的部落格?
答:Cocoa Manifest、Cocoa With Love、Cocoa Samurai、Matt Gemmell、Cocoa Is My Girlfriend、mikeash的NSBlog。
問:還有問題怎麼辦?
答:網路上有很多Q&A論壇,譬如Stack Overflow,這網站上有很多人討論iOS軟體開發。
問:想在iOS(iPhone, iPod Touch, iPad)上開發,有何教學文件?
答:
1. The iOS 5 Developer's Cookbook: Core Concepts and Essential Recipes for iOS Programmers by Erica Sadun。
學習iOS軟體開發不錯的入門書,從iOS SDK 2.x開始一直更新到現在的iOS 6.x。從基本講起,範圍廣泛,這本範例很多。
iOS 5的中文翻譯本,書名是"iOS SDK 開發範例大全"。
iOS 6的原文書The Core iOS 6 Developer's Cookbook,於2012年12月出版。
注意:此次改版,作者Erica與出版社將iOS軟體開發分成三本書:
導論、介紹Objective-C、介紹Xcode、App如何上架、UIKit的基本功夫(視圖、控制器、基本視覺元件),大致上就是前一版(iOS 5那本)的第1~7章,獨立出來放在Learning iOS 6: A Hands-on Guide to the Fundamentals of iOS Programming裡,預計在2013年7月出版,約600頁。
而The Core iOS 6 Developer's Cookbook這本,內容包含觸碰與手勢、自訂控制元件、各種UIKit元件、視圖與動畫、文字輸入、常用控制器、表格視圖、捲動、畫面編排、等等iOS開發的核心知識,以及初階介紹Core Data與網路連線,約570頁。詳細目錄在此。
進階內容在The Advanced iOS 6 Developer's Cookbook裡,預計在2013年3月出版,約500頁,內容包含Store Kit、Game Kit、Core Location、各種特殊用途的軟體開發框架。
2. Beginning iOS 5 Development: Exploring the iOS SDK by David Mark, Jack Nutting, Jeff LaMarche。
這本是學習iOS不錯的入門書,不斷地改版更新,從一開始的iPhone OS 2.x、3.x,到現在的iOS 4.x、5.x、6.x版。
iOS 4有中文翻譯本。
iOS 5的中文翻譯本出版了,書名是"探索 iOS 5 程式開發實戰"。
iOS 6的原文書,預計在2013年1月出版。
這本書的姊妹作為More iOS 6 Development: Further Explorations of the iOS SDK,2012年12月出版,內容比較進階。
3. iOS Programming: The Big Nerd Ranch Guide by Joe Conway and Aaron Hillegass。
也是學習iOS軟體開發的入門書,內容風格與前兩本不同,請讀者自行翻閱看看,看看哪本比較適合您。
Third Edition內容涵蓋iOS 5與Xcode 4.3,於2012年3月出版。
4. 美國史丹佛大學跟蘋果公司合作開課。iPhone Application Development (Winter 2010),YouTube上課錄影或是到iTunes上,這裡有投影片與作業,這邊有Inside網站刊載的心得筆記(中文)。這課程還有繼續開,但最新的上課內容並沒有開放出來。
5. 熱心人士自己錄製的教學錄影Learning iOS Development,放在YouTube上。
6. 其他,自己找找囉,這篇列出32個開發資源網站,非常棒。
問:有哪些線上資源、網站或部落格?
答:
- Ray Wenderlich | Tutorials for iPhone / iOS Developers and Gamers,文章非常豐富,有iOS的、有遊戲開發的,而且還集結成書出版。
- Call Me Fishmeal. 格主是在mac圈打滾的,部落格上有一些關於Objective-C程式設計的文章,但近來技術性文章越來越少,變成談論性質的。
- Apple iPhone iPad 最棒的華語影音教學網站,顧名思義,這是給使用者看的,不是開發人員看的。
- iDevTW - iPhone/iPad 開發者論壇。
- 還有很多其他的,自己找找囉。
在Windows上寫Objective-C程式(使用GNUstep與Clang、LLVM)
之前我寫了一篇Objective-C on Windows,以GNUstep在Windows XP上寫Objective-C程式,但是Objective-C已經加了很多新東西,而GNUstep裡的gcc並不提供,所以,這篇要介紹GNUstep,再加上新一代的編譯器架構Clang與LLVM(這也是Apple在新版Xcode裡預設使用的編譯器),這樣就能有Objective-C 2.0的功能,以及block與ARC(automatic reference counting)。
問:想開發iPhone或iPad或Mac的軟體,該怎麼辦?
答:使用Apple官方的軟體開發工具Xcode,只要到Apple公司的開發者網站,註冊一下(免費),即可下載最新版的Xcode。Xcode只能在Mac OS X(作業系統)上運行,所以要買一台Mac機器(硬體)。
PS 最新版的Xcode可以直接從Mac App Store下載。
問:哇,這麼多種漂亮的Mac,應該買哪一台啊?
答:有錢的話就買最貴的那一台*_*。

問:什麼是Xcode?
答:Xcode是Apple公司官方的軟體開發工具組,可開發在Mac、iPhone、iPad的軟體,是一個總稱,裡面包含很多東西,有整合式開發編輯器(IDE,也叫做Xcode)、視覺化使用者介面開發工具(Interface Builder)、compiler、linker、debugger(gcc、gdb、llvm...)等等、還有模擬器,以及各種framework(函式庫、類別庫、API)。
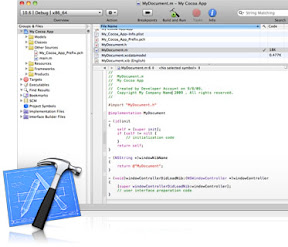
這是Xcode IDE,負責管理專案檔案、編輯、以及各種設定,從這裡進行編譯除錯執行。
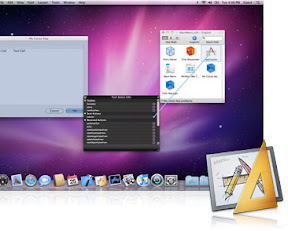
這是Interface Builder,視覺化使用者介面設計,使用拖拉放的方式來操作。(在Xcode 4以前是支獨立的軟體,之後Xcode IDE已經整合Interface Builder。)
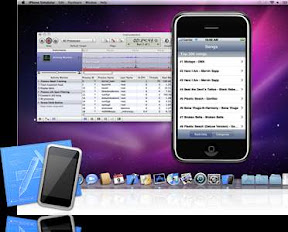
這是模擬器,不用買一支iPhone也可以進行開發iPhone軟體喔。
也就是說,如果你有一台Mac電腦(花錢買),下載Xcode(免費下載)後,就可以開始開發,在模擬器上執行看到成果。但是,如果想在iPhone實機上執行你寫的程式的話,那就要加入Apple的iOS Developer Program(要錢,一年要付$99),至於加入、付錢、設定、下載軟體到手機上的過程,本篇不介紹。
問:想先學學Objective-C程式語言,還不想砸錢買Mac,有辦法在Windows上寫Objective-C程式嗎?
答:有,就是這篇的重點了。
問:聽說gcc可以編譯Objective-C,所以在Windows上裝cygwin,裡面有gcc,就可以寫Objective-C程式了?
答:cygwin的gcc的確可以編譯Objective-C程式,但光裝cygwin並不會有任何的物件類別庫(library、class library、framework),所以也就沒有各種基本的物件類別可以用,沒有NSLog可以呼叫(想像成c的printf);沒有NSObject可以繼承,讓你沒辦法立即開始寫自己的物件;沒有Foundation.h(想像成c的stdio.h)連preprocessor都過不去,更別提compiler了。所以只有compiler是不夠的。而且,一般版本的gcc裡頭的Objective-C部分,很舊,沒有許多Apple加入的新功能。
同樣的,若只有clang(llvm)也不夠。
問:所以除了compiler還需要?
答:還需要一套framework,裡面會有基本的物件類別。如果是裝Xcode就會有Cocoa for Mac、Cocoa Touch for iPhone。Cocoa大致上分為Foundation跟AppKit兩個部分,AppKit是GUI元件與較高階的元件,而Foundation就是一堆基本的物件類別,例如NSObject、NSString、NSArray、NSNumber等等;而Cocoa Touch分成Foundation跟UIKit,差不多的意思。
問:聽說Cocotron...?
答:Cocotron也是一個Objective-C的開發環境,其目標是讓開發出來的軟體可以在各種平台上執行,例如Windows,但其本身還是要搭配Xcode使用,所以不符本篇主題。
問:那所以咧?
答:使用GNUstep,可在unix-like與Windows上使用,有Cocoa API,也有一些開發工具(類似Xcode提供的工具)可以用,但本篇重點是在Windows上寫一支Objective-C的hello world!程式,所以會用命令列模式shell,只會使用compiler的部份(也是gcc),以及鏈結Cocoa API中Foundation的部份,也就是說不理會AppKit的部分,也不會介紹GNUstep提供的開發工具(Gorm, ProjectCenter...)。
因為GNUstep裡的gcc,其Objective-C的部份很舊了,無法編譯Objective-C的新功能與特色,所以除了GNUstep,我們還需要安裝clang(llvm)。
問:GNUstep可在哪些版本的Windows上跑?
答:官方網站上說在WinXP與Win2K測試過,我的電腦是Windows XP。
問:怎麼安裝GNUStep?
答:到GNUstep網站的Windows下載區,下載下面三個安裝套件。
1. GNUstep MSYS System,53MB,基本環境與命令列shell。
2. GNUstep Core,9MB,函式庫、類別庫。
3. GNUstep Devel,44MB,開發工具,gcc、make、gdb等等。
注意:請按照順序安裝。

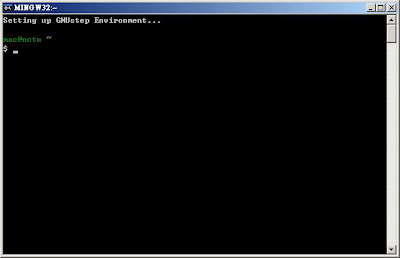
把三個都安裝在同一個目錄(預設值是C:\GNUstep),安裝時也都是按Next即可。安裝後執行「開始-程式集-GNUstep-shell」,會出現一個命令列畫面,恭喜你,已經成功了一半。
問:怎麼安裝clang(llvm)?
答:
首先,我們將下載原始碼自行編譯,編譯時需要很多工具,前面安裝的GNUstep幾乎都有了,但還缺個python,請到python官方網站下載頁面,下載python的windows版,我下載的是2.7.2版。安裝後,修改環境變數(開始-設定-控制台-進階-環境變數),將「C:\Python27」(這是預設的安裝路徑)加入「PATH」。
然後,開啟「程式集-GNUstep-shell」,依序執行下列指令:
第一道指令會下載llvm(約106 MB),第二道指令切換目錄,第三道指令下載clang(約65 MB)。
然後,我們需要修改clang一些寫死的路徑,請用文字編輯器開啟「C:\GNUstep\msys\1.0\home\username\llvm-tools-clang-lib-Frontend\InitHeaderSearch.cpp」,尋找字串"FIXME: temporary hack: hard-coded paths.",大約在第215行附近的地方,加入底下這幾行。
...
// FIXME: temporary hack: hard-coded paths.
AddPath("C:\\GNUstep\\include", System, true, false, false);
AddPath("C:\\GNUstep\\msys\\1.0\include", System, true, false, false);
AddPath("C:\\GNUstep\\lib\\gcc\\mingw32\\4.6.1\\include", System, true, false, false);
AddPath("C:\\GNUstep\\lib\\gcc\\mingw32\\4.6.1\\include\\c++", System, true, false, false);
AddPath("C:\\GNUstep\\GNUstep\\System\\Library\\Headers", System, true, false, false);
//AddPath("/usr/local/include", System, true, false, false);
break;
....
記得要把原有的AddPath("/usr/local/include", System, true, false, false);拿掉。
存檔後,接下來就是要進行編譯了。
$ cd ~/llvm && mkdir build && cd build

$ ../configure --enable-optimized --enable-targets=host-only

$ make

$ make install
第一行切換目錄到llvm底下,並建立一個build目錄,我們將把編譯後的東西放在這個目錄下。
第二行做一些設定。(需要一點時間,看你的機器多快。)
第三行進行編譯。(需要花很多時間,看你的機器多快。)
第四行進行安裝。雖然會出現groff的錯誤,但沒關係。
安裝後,你可以執行
$ clang --version
檢查會不會秀出版本編號。
clang version 3.1 (trunk 153251)
Target: i686-pc-mingw32
Thread model: posix
問:接下來,怎麼編譯執行一支hello, world!程式呢?
答:
$ cd ~
$ mkdir hello
$ cd hello
在家目錄下建立一個新目錄hello。我們將放入兩支檔案。
家目錄大概是C:\GNUstep\msys\1.0\home\username,自己找找。
首先是hello.m,用你喜歡的編輯器寫程式,大致內容如下:
#include <Foundation/Foundation.h>
int main(int argc, char * argv[]){
@autoreleasepool{
NSLog(@"Objective-C has ARC now, yeah.");
}
return 0;
}
另一支檔案是GNUmakefile,內容如下:
include $(GNUSTEP_MAKEFILES)/common.make
TOOL_NAME = hello
hello_OBJC_FILES = hello.m
include $(GNUSTEP_MAKEFILES)/tool.make
然後以這道指令進行編譯與連結:
成功後,執行檔會在hello目錄的子目錄obj裡。
$ ./obj/hello.exe
應該就能看到輸出"Objective-C has ARC now, yeah."了。
恭喜你。
根據我的測試,property與fast enumeration都沒問題。ARC也可以。garbage collection與non-fragile instance variables我沒測試。
問:block呢?
答:需要開啟編譯器選項-fblocks,請修改C:\GNUstep\GNUstep\System\Library\Makefiles\common.make,尋找"INTERNAL_OBJCFLAGS = ",在後面加入"-fblocks"。
這麼一來,底下這支使用block的程式,應該就能成功編譯並執行了。
#import <Foundation/Foundation.h>
int main (int argc, char * argv[])
{
@autoreleasepool {
void (^print_message)(void) =
^(void) {
NSLog (@"hello, block.");
} ;
printMessage ();
}
return 0;
}
問:Objective-C與iOS的學習資源?
答:請看另一篇。
參考文件:
Solarian Programmer's Clang and Objective-C on Windows。
2012/03/19
Compile and Upload Arduino sketches under Windows and Cygwin
My environment is Windows XP and Cygwin. I use Arduino Uno Rev 3,Arduino Software 1.0.
After using Arduino software(IDE) for a while, I felt it's not efficient. Every time I click Sketch-Verify/Compile or File-Upload, it takes a period of time. We can go to File-Preferences and click both "Show verbose output during: compilation and upload", to clearly see what steps it executes.
Besides compiling sketches, it also needs to compile the Arduino core source files in hardware\arduino\cores\arduino. But! It compiles them everytime. Why? Those files are not touched, they don't need recompilation. And If I use Sketch-Verify/Compile to check if the sketch is ok, then use File-Upload to upload to microprocessor, well, the Arduino software does it all over from the very beginning. It's no good.

Anyway, Arduino software(IDE, development environment) is not very smart. I'll introduce how to use make and Makefile to do compilation and uploading in Cygwin command line mode.
First of all, we still need to install Arduino software. We are going to use the command line mode(terminal) instead of the IDE, but still need various tools and Arduino core source files in it.
Then, install Cygwin. Download Cygwin's setup.exe here. Install it as following.
Launch setup.exe. We will download cygwin and install it from Internet, so choose first option "Install from Internet".

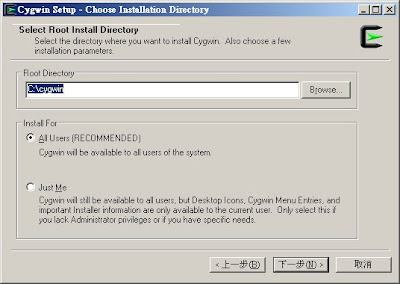
Specify a directory to install. Default is C:\cygwin. Don't not change it unless you know what you're doing.
setup.exe will keep the downloaded package in another directory. Please specify some path.

Specify internet connection according to your setting.

Then, choose a server to download. Maybe choose one according to your country.

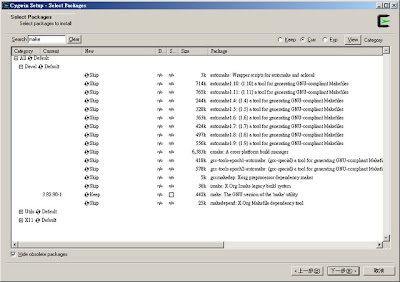
Then choose what packages to install. Defaults won't install "make". So we need to choose it manually.

Input "make" in Search field. Under "Devel" category, choose "make: The GNU version of the 'make' utility". It should show 3.82.90-1 or similiar version number.
Then download and install. setup.exe might prompt you to install some dependent packages, confirm it.
I also install many other packages, so my C:\cygwin is about 700 MB.
However, new version of make can't correctly handle the Makefile I wrote. So we need to revert back to version 3.80. Launch cygwin terminal, do the following steps to change back to 3.80.
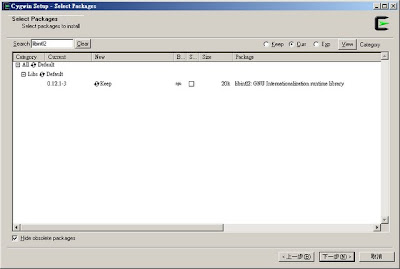
make 3.80 also need some library, so please launch setup.exe one more time, and install this library "libintl2".
Check it. execute "make --version" in cygwin terminal. It should respond "3.80".
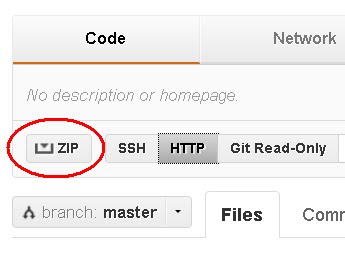
You can download the example sketch using make here. Use ZIP button to download all sketches I wrote. However, you only need the one in the directory "BlinkMakefile"
In the directory BlinkMakefile, there are total 6 files: BlinkMakefile.cpp, foo.c, foo.h, bar.cpp, bar.h, and Makefile。(Other directories contains my other Arduino practices. You can ignore them)
BlinkMakefile.cpp, the code will flash LED of pin 13. The difference is that we need to put#include <arduino.h>at the top of the file. Because, Arduino software does it for us, now we need to do it by ourselves.
For demonstration, I also add a C source file foo.c and its header file foo.h. It contains a function called delayDuration returning 1000 whatever. BlinkMakefile.cpp uses this value as the time period of lighting LED on.
For demonstration, I also add a C++ source file bar.cpp and its header file bar.h. It contains a class ClassBar, a member function getDelayDuration to return a value. Everytime you called this function, the value will increase 100. First time returns 100, second time returns 200, etc.. BlinkMakefile.cpp will use this value as the time period of lighting LED off. So the off period will become longer and longer.
Now comes to the main player Makefile. Excuse me for not explaining the syntax and meaning of Makefile in detail. I'm not an expert. Following are what you need to modify and adapt.
Originally, Arduino software use .pde or .ino filename extensions. Please change to .cpp.
PROJECT = BlinkMakefile
The filename of the final product files(.elf, .hex. .eep). Change to anything you want, better be no spaces.
ifndef PROJ_SOURCE
PROJ_SOURCE := $(wildcard *.c) $(wildcard *.cpp)
endif。
This will find out all sources file(.c and .cpp). Please put all souce files of your project in the same directory as the Makefile. Don't use sub-directories.
MCU = atmega328p
What microcontroller chip does your board use. Compiler needs this setting to generate correct binary machine code. My board is Arduino Uno Rev3, so uses atmega328p. Both compiling and uploading need this setting.
F_CPU = 16000000L
Frequency of the microcontroller. It seems the same for all boards to maintain backward compatibility, so you probably don't need to change.
ARDUINO_VERSION = 100
The version number of you Arduino software. This will pass into compiler, you can use this in code.
FORMAT = ihex
Output format. Probably no need to change.
PORT = \\.\COM3
Serial port. This is from Tools-Serial Port in Arduino software. You might be curious what is \\.\ for. This is related to some weirdness about argument specification, windows path, etc.. Anyway, just leave it.
UPLOAD_RATE = 115200
Transmission baud rate of the serial port. Normally it is 9600. But my board can use 115200. Uploading needs this setting.
INSTALL_PATH = D:/Arduino/arduino-1.0
This path should point to the top-most directory of the Arduino software. It's where containing the executable file arduino.exe, folder example, folder libraries, etc.. Please change it according to yours.
CORE = $(INSTALL_PATH)/hardware/arduino/cores/arduino
This path should point to the directory of Arduino core source files. It's where containing Arduino.h, wiring_analog.c, wiring_shift.c, etc.. I let it be a path relative to INSTALL_PATH.
BUILTINLIB = $(INSTALL_PATH)/libraries
Path to the Arduino built-in libraries containing EEPROM, Ethernet, LiquidCrystal, etc.. I let it be a path relative to INSTALL_PATH.
SKETCHBOOK = D:/Arduino/sketchbook
The sketchbook path. A path to your sketches/projects.
THIRDPARTYLIB = $(SKETCHBOOK)/libraries
Path to the third-party libraries(the external libraries you installed). I let it be a path relative to SKETCHBOOK.
AVRDUDE_PROGRAMMER = arduino
What programmer to upload the sketches/code/programs. "arduino" means to use the bootloader inside microcontroller to do uploading. According to your board, might be stk500, stk500v1, or stk500v2. Available settings please refer to the document of the tool avrdude which is used to do uploading(programming).
If you need to use the built-in libraries, please modify this line:
BUILTINLIB_ENABLED =
Put the names of libraries after the equal sign. For example:
BUILTINLIB_ENABLED = EEPROM Ethernet Firmata LiquidCrystal
(BUILTINLIB should point to the directory of the built-in libraries)
If you need to use third-party libraries, please modify this line:
THIRDPARTYLIB_ENABLED =
Put the names of libraries after the equal sign. For example:
THIRDPARTYLIB_ENABLED = BOUNCE
(Without saying, you have to download the libary, uncompress, put it in the directory pointed by THIRDPARTYLIB)
Others in the Makefile, they are related to the tool make. Please consult other document if you're interested.
Now, launch cygwin terminal, change working directory to BlinkMakefile. Use the following commands to do compiling and uploading.
First of all:
If execute make again, it should appear make: Nothing to be done for `all'. Wonderful.
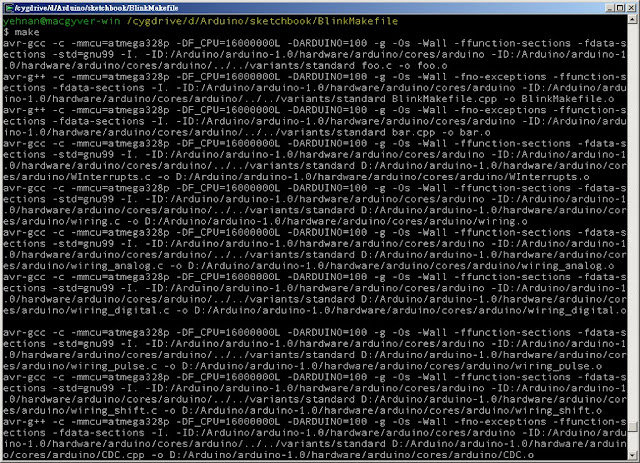
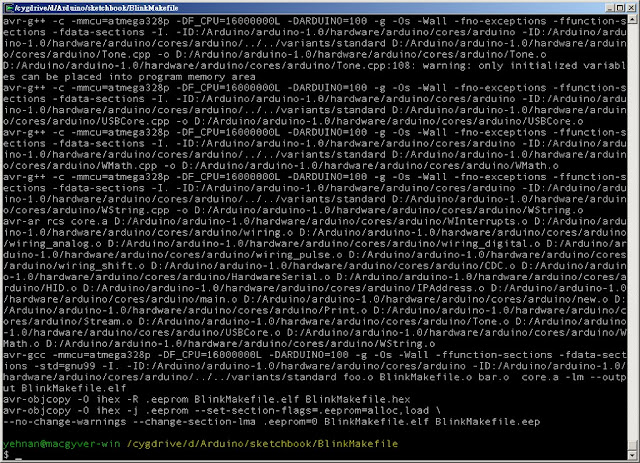
This is the screen snapshot of my executing make.
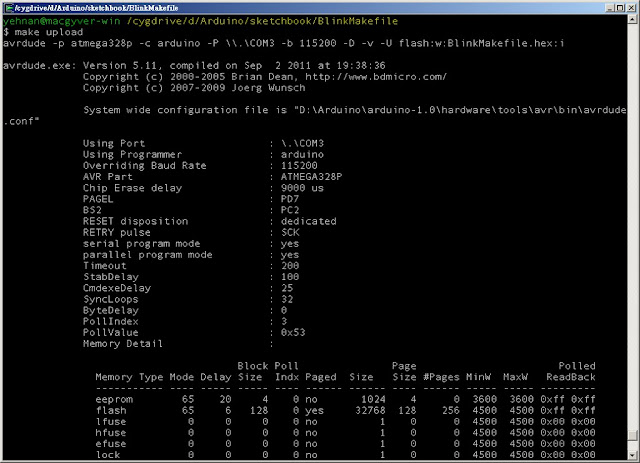
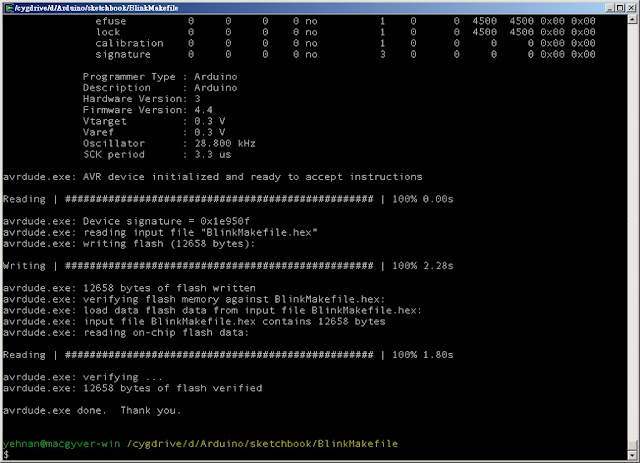
This is the screen snapshot of my executing make upload.
Well, there is a little problem. Originally we can use the Tools-Serial Monitor of the Arduino software. What now?
You can instead use Windows's HyperTerminal or Tera Term or PuTTY、Roger Meier's CoolTerm。
Done.
P.S. I use free version of avast! anti-virus software. It slows down exectuting make, avr-g++, and avr-gcc. So I need to execude those executable files in the avast! settings. (Before 60 seconds, after 5 seconds.)
參考資料:
- Arduino Official website,Arduino Build Process。
- Arduino Playground(wiki),Arduino from the Command Line,Windows command line build。
- Johannes Hoff: Arduino on the command line。
- Martin's Atelier: Arduino from the command line。
- Wikiid: Command line Arduino。
- AVRDUDE - AVR Downloader/UploaDEr,avrdude's arguments。
- avr-gcc、avr-g++、avr-ar、avr-objdump、avr-objcopy、avr-size。
- Dependency Generation with Subdirectories using gcc。
- GNU make, how to determine a path is a file or a directory?。
- GNU Make Manual。
2012/03/05
Arduino小知識:為什麼LED需要串聯的電阻值是220 ohm?
使用LED時,通常會串聯一個220 ohm電阻,但為什麼是220 ohm呢?
從Arduino的5V腳位或其他腳位,可以輸出5V電壓,不過通常會稍低一點。
一般LED的forward voltage大概在2V上下,最大可能到2.5V。一般LED的forward current約在20mA(0.02A)上下,最大可能到30mA。當然,不同的LED會有不同的規格,須查閱資料表。
好,有了這些資料,就可以算出該串聯多少ohm的電阻了。

電壓為5V,而LED的voltage drop為2V,所以電阻兩端的電壓會是3V。電路上各處的電流皆相同,所以通過電阻的電流跟通過LED的一樣,也就是0.02A,接下來,根據歐姆定律Ohm's Law(R = V / I)算出電阻應為3 / 0.02 = 150 ohm,為了保險起見,選擇較大一點的,也就是220 ohm。
嘛,應該就是這樣吧,也不一定非要220 ohm不可。
參考資料:
- Evil Mad Scientist Laboratories的Basics: Picking Resistors for LEDs,如何為LED挑選限流電阻,非常詳盡。
- Arduino官方論壇:330 OHM Resistors (instead of 220 OHM)?。
- Doctronics的Safety Lights Project 5. Limiting current。
- Calculating an LED resistor value與Reading a table of technical data for LEDs。
2012/03/03
一篇關於Raspberry Pi的報導、錯誤百出
更新:底下這篇報導後來有再刊登勘誤啟示,嗯,還不錯。
這裡有一篇關於Raspberry Pi的報導,網站是news.com.au,應該是澳洲的吧,幾乎每一個句子都有錯誤。真是笑死我了。
無線滑鼠與鍵盤?哪來的啊,你腦補的太嚴重了喔?呵呵。
USB、HDMI、Ethernet,每台電腦都有這些東西吧,你幹嘛用almost every這個字眼啊?真是搞不懂你啊。